

Table Of Contents
- Introduction
- What Is Needed
- Background Information
- Swift On macOS
- Swift On Other Platforms
- Using The Xcode IDE (macOS Only)
- Simple Compile
- Running Swift As A Script; No Compilation Necessary
- Using The Swift Package Manager
- Summary
Introduction
In this tutorial you will learn how to create and execute a simple Swift program in a variety of ways.
What Is Needed
- Linux Or macOS Based Computer
- Xcode IDE (macOS Only)
Background Information
The Swift programming language was created by Apple as a modern alternative to Objective-C as the primary language used in developing applications for macOS, iOS, watchOS, and tvOS. It was announced at the 2014 Apple World Wide Developer Conference and open sourced for community development in December of 2015. It has since gained immense popularity as a versatile programming language used not only for writing applications, but for server-side (web) programs as well and is now available across multiple platforms. The latest version, Swift 4.1, was released on March 29, 2018.
Due to Swift’s popularity, there are many tutorials and resources available on the web to help you learn the language, however, Apple’s own documentation is a great place to start:
- Swift Overview provides a general overview of the latest version of the language.
- Swift Resources lists various documentation, sample code, videos, and courses available.
- The Swift Programming Language (Swift 4.1) book is the official language reference which is also available in iBooks.
- Swift.org is the community portal focused on the open source aspect of Swift and delves into the nitty gritty of Swift language development.
In addition, the Ray Wenderlich (for tutorials) and Stack Overflow (for programming questions) websites are very popular among developers and those wanting to learn or advance their knowledge of the language.
Swift On macOS
Since Swift was originally created by Apple, it makes sense that macOS is the primary operating system for developing Swift programs. Xcode is Apple’s Integrated Development Environment (IDE) that runs on macOS and is used for developing applications that run on the various Apple platforms, e.g., Mac, iPhone, etc. It is also very popular among developers due to it’s ease of use and robust feature set. An Apple supported version of Swift is included with all recent Xcode releases. Download and install Xcode from the App Store and Swift will be set up for you automatically. Installing Xcode even provides you with the command line tools necessary for writing programs outside of the Xcode IDE.
You can also install multiple versions, including Beta versions, of Swift for use with Xcode. Most people, however, are perfectly happy to just use the default version that comes with the latest version of Xcode. Instructions are available on Apple’s Download Swift page if you are interested.
Swift On Other Platforms
Swift is available on platforms other than macOS, primarily through command line usage as you are not able to use the Xcode IDE. For this reason, some developers write their Swift programs within Xcode on macOS and copy the source code files to other platforms for compiling and usage.
Swift is fully supported on Ubuntu versions 14.04, 16.04, and 16.10 and has been shown to run correctly on other Linux distributions as well. Please see Apple’s Download Swift page for instructions on installing Swift on Linux.
Swift has been available for a while on Raspberry Pi as long as it was running one of the supported Ubuntu releases. With the release of the official Raspbian Stretch operating system last year, Swift 3.1.1 now compiles correctly and is finally available for widespread use on the Raspberry Pi development platform. Later versions of Swift are not yet available due to a couple of bugs that still need to be resolved. For further information and instructions on installing Swift on Raspberry Pi running Raspbian, including the aforementioned bugs, please see this post by Umberto Raimondi.
Swift is also available on the Windows and Android platforms, but I do not have any experience with Swift in these areas. For those of you interested, Apple has provided Getting Started with Swift on Windows and Getting Started with Swift on Android documents on their GitHub site that you may find useful.
Using The Xcode IDE (macOS Only)
In this section you will learn how to create a new Swift based project within the Xcode IDE.
Download and install Xcode from the App Store if you have not done so already. Upon first opening Xcode, it will ask you to install additional components that allow you the capability of running the Swift compiler from the command line. Please follow the on screen instructions to install these components as we will use them later.
Open Xcode and select Create a new Xcode project from the Welcome to Xcode window that pops up. You can also create a new project by selecting File > New > Project… from the main menu. Click the macOS tab and choose the Command Line Tool project template from within the Application section of the template chooser window as shown below.

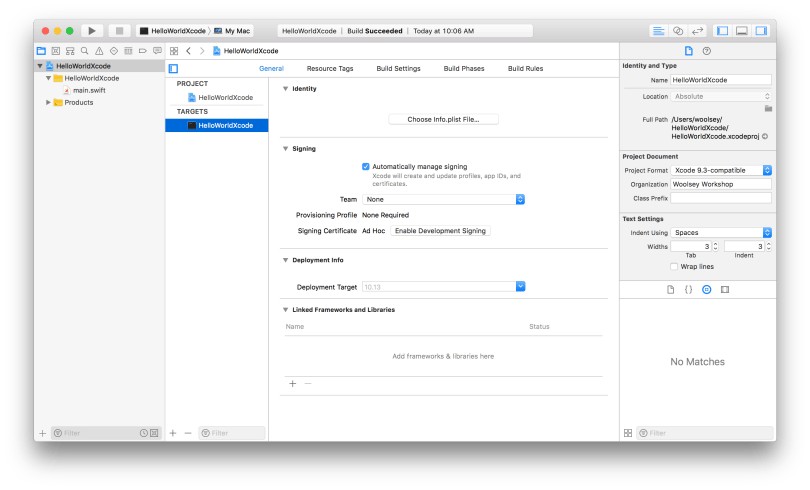
Click the Next button and you will be taken to another window where you select the options for your project. Enter HelloWorldXcode in the Product Name field. This will be the name of your new project and resulting command line executable program. Leave the Team field as None. This field will need to be set when you submit an application to the App Store, but for now, we can just leave it as None. The Organization Name is the name of the individual or organization to which you belong. I used Woolsey Workshop for my organization name, but you can use any name you like as long as it actually represents you or your team. The Organization Identifier field is used to uniquely identify you or your organization’s name in a reverse URL format. I chose com.woolseyworkshop as mine. You will notice the Bundle Identifier field automatically changes to reflect your settings and is used to distinguish your application from any other’s when submitting your application (bundle) eventually to the App Store for others to use. Finally, select Swift in the Language field.

Click the Next button and select the location where you want to save your new Xcode project. Click the Create button when done and a new project window will appear.
Click on the main.swift file located in the left hand pane (Navigator area) and you will see the source code contents of the file within the middle pane (Editor area). As you can see, it already contains the necessary code to print Hello, World! to the screen.
Before running our new program, we need to open a console so that we can see the expected output. To do this, select View > Debug Area > Activate Console from the main menu and a new pane will be shown at the bottom of the window that contains the Debug area on the left and the Console area on the right.
Select Product > Run from the main menu and Xcode will build (compile) and run your new program. You should now see the expected Hello, World! text printed to the console. Alternatively, you can also click the Run button which looks like a Play music button located on the left hand side of the top toolbar.

Congratulations, you just compiled and executed your first Swift program!
To locate the program you just created, click the little arrow button to the left of Products in the Navigator area to reveal the HelloWorldXcode command line executable. Control-click on the executable name and select Show in Finder from the contextual menu that pops up. Copy the executable from the resulting Finder window to your home directory. Open a terminal window and run the following command. The % symbol shown is the command line prompt character, which should not be typed, and yours may be different.
% ~/HelloWorldXcode
It should print out the same Hello, World! text as you saw in the Xcode console. By the way, the extra ~/ in front of the executable name ensures that you are running the HelloWorldXcode program located in your home directory. It would be quite confusing if some other HelloWorldXcode executable found by the system was run instead.
Go back to your Xcode project and change the Hello, World! text or add your own print statement(s) below the original one. Rerun your program and see the difference in the console.
I know this seemed like a lot of work to build and run your first Swift program without even writing a single line of code yourself, but now you know the basics of how to create a new simple project in Xcode and begin learning and utilizing all of the rich features that Xcode has to offer. Extensive help on how to use Xcode can be found under Help from the main menu, specifically Xcode Help for those just starting out.
Exit the Xcode application once you are done.
Simple Compile
In this section you will learn how to create a new Swift command line executable using the command line compiler.
Open a terminal window and create a new file named hello.swift in your favorite text editor that contains the line below.
print("Hello, World!")Run the Swift compiler with the following command to compile your new Swift program
% swiftc hello.swift
which will create an executable aptly named hello. Reminder, the % symbol is the command line prompt and should not be typed. Run the new Swift executable with
% ./hello
which will output the following to your screen.
Hello, World!
Did you expect anything else? 😉 The extra ./ in front of the executable name ensures that you are running the hello program located in your current directory.
Running Swift As A Script; No Compilation Necessary
In this section you will learn how to create a new Swift script that runs the Swift interpreter.
Did you know that you can use Swift for writing scripts too? This is accomplished by adding the following as the first line of your script file, which tells the system where to find the Swift interpreter, and marking the file as executable.
#!/usr/bin/swiftThis line may need adjusting if the swift interpreter is located in a different location on your system. This can be determined by running the following command.
% which swift
If the output shows a location other than /usr/bin/swift, use that location instead. Now let’s create the script. Copy your hello.swift program created earlier to a new file named hello_script.swift.
% cp hello.swift hello_script.swift
Add the appropriate #! line from above to the top of the file using your favorite editor. The new file should look similar to the following.
#!/usr/bin/swift

print("Hello, World!")
Next, let’s make the script executable.
% chmod +x hello_script.swift
Run the new Swift script.
% ./hello_script.swift
The output of the hello_script.swift script should be identical to the output of the hello.swift program we compiled and executed previously, but it took a little longer to run since the Swift code had to be interpreted on the fly. This is usually acceptable for small scripts, but can become a nuisance for larger ones.
Using The Swift Package Manager
In this section you will learn how to create a new Swift based project with the Swift Package Manager (SPM).
The Swift Package Manager is a tool built into the Swift build system for managing Swift projects and dependencies. It automates the process of creating (initializing), managing, building (compiling), running, and testing your Swift based projects. Let’s begin creating a new SPM project by first creating a directory based on our new project name
% mkdir HelloWorldSPM
and then go into that directory.
% cd HelloWorldSPM
Next, we will initialize the project as an executable
% swift package init --type executable
which will create various files and directories to set up the new project. The main.swift file is located in the Sources/HelloWorldSPM directory and already contains hello world example code. You can print the contents of this file with the following command.
% cat Sources/HelloWorldSPM/main.swift
Build and run the new executable
% swift run
and you should see the following text printed after the Compile and Linking messages.
Hello, world!
One of the main purposes of using SPM is to manage dependencies, so let’s add one. The Progress library provides the means to display progress bars in your command line applications. Edit the Package.swift file and change line 10 from
// .package(url: /* package url */, from: "1.0.0"),
to
.package(url: "https://github.com/jkandzi/Progress.swift", from: "0.0.0"),
and line 17 from
dependencies: []),
to
dependencies: ["Progress"]),
Run the following command to load the Progress package into your project.
% swift package update
Next, let’s update our Swift program to include a progress bar using this new library. Edit the main.swift file to add the following code before your hello world print statement.
import Foundation
import Progress

for _ in Progress(1...100) {
   usleep(100000)
}
Run the program again with
% swift run
to see the progress bar in action.
100 of 100 [------------------------------] ETA: 00:00:00 (at 9.67) it/s)
Cool, right? Let’s change the look of the progress bar by adding the following configuration line before the for loop in the main.swift file.
ProgressBar.defaultConfiguration = [ProgressString(string: "Percent done:"), ProgressPercent()]Run the program again and you should see an alternate configuration showing only the percent completed.
Percent done: 100%
Using the Swift Package Manager to manage library dependencies can be very valuable for use on large projects along with utilizing code others have already written (and hopefully thoroughly tested).
Before leaving this section, I wanted to let you know that if you are on a Mac and wish to use SPM to manage your dependencies along with editing your source code within Xcode, SPM has the ability to automatically generate an Xcode project for you. This can be done by running the command below within your project directory, but be aware that if you go this route, you will need to build and run your project from within Xcode from then on instead of from the command line. This is not necessarily a problem, as it could be quite useful to harness the power of Xcode for your project, but it is good to know the limitations.
% swift package generate-xcodeproj
Summary
In this tutorial we learned
- that Swift is a new open source programming language available on a variety of platforms,
- how to create and execute a Swift program
- using Xcode on macOS,
- with a simple compile on the command line,
- as a script from the command line, and
- using the Swift Package Manager.
The final source code for this tutorial is located on GitHub for your reference.
Thank you for joining me in this journey and I hope you enjoyed the experience. Please feel free to share your thoughts in the comments section below.
Thanks, John, for this quick intro. I’m coming from other languages and wanted to do a hello world without diving and possibly drowning in Xcode.
You are very welcome. Thanks for visiting.